Sunday, 17 November 2013

Pistachio Meringue with a creme de marron, fresh cream and raspberry filling

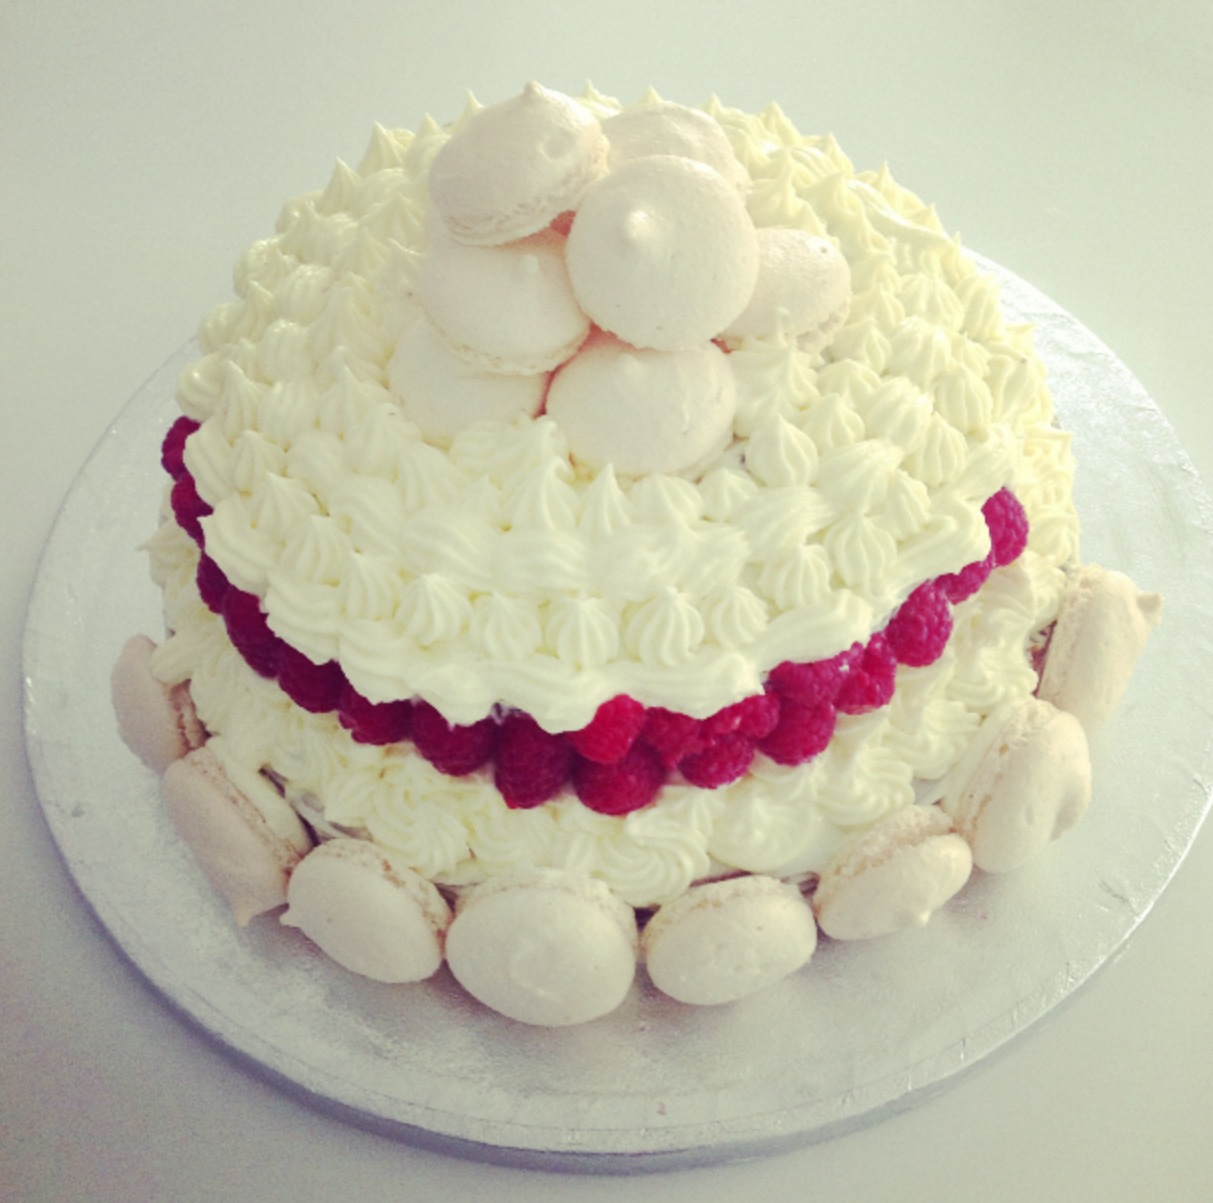
This pistachio meringue will impress your guests no doubt! It is light dessert if you have just had a big meal. The different textures are a winner, the crunch of the meringue, the smoothness of the cream, the sweetness of the marron cream and the tanginess of the raspberries. This is a perfect dessert for a dinner party or to impress your family at christmas. It is simply divine!


Ingredients

5 egg whites
110g of sugar
1 bag of Pistachio's (crushed - if not buy them whole and chop them up yourself with a knife)
1 small tin of Creme de marron ( order online from french stores- It is worth it I promise)
2 large pots of Double cream
2 packs of raspberries 
Edible gold glitter for decoration
Piping bag


Recipe


1. Start by preparing your pistachio's. I brought mine whole so I took them out of there cases and chopped them all up with a knife into small pieces. 

2. Preheat the oven to 120C (fan assisted).

3. Separate your egg whites. I usually do this by cracking the entire egg into my hand under my mixing bowl and let the egg whites seep through my fingers. Make sure you do not let any egg yolk slip through as this will ruin your meringue. 

4. With an electric whisk, whisk your egg whites, when they start to foam up add the sugar a little a time whilst still whisking. Whisk until they are stiff enough to turn the bowl upside down over your head without nothing spilling out. 

5. Draw round a cake tin around 8inches wide onto baking paper, and then again on another piece of baking paper. 

6. Spread the meringue into the circles you have drawn on the baking paper. Make sure they are both even. 

7. Sprinkle the crushed pistachios on top of the meringues.

8. Put them into the oven for 1 hour and 20 minutes, swopping the below meringue to the top of the oven half way through. 

9. When the time is up, turn off your oven and leave the meringues in for another 1 hour and 30 minutes. 

10. Once this time is up take out your meringues and peel off from the baking paper. ( Be careful as they can stick sometimes)

11. Place them both onto a plate whilst you prepare the filling. 

12. Whisk the two pots of the double cream with an electric whisk until they are stiff enough to hold onto a spoon. Add some more crushed pistachio's into this cream and give it another mix with a metal spoon.

13. Place a meringue disk onto the bottom of your serving dish and spread an even layer of your pistachio cream on top.

14. Get your creme de marron and spread mostly all of this on top of the cream. Leaving a little extra for decoration. 

15. Place some halved raspberries onto of the creme de marron.

16. Add another layer of your pistachio cream.

17. Add your final layer of the meringue and top with raspberries and more pistachios. 

18. Put the rest of the pistachio cream into a piping bag and fill in the sides of your pavlova and smooth round the edges so everything is covered. 

19. Add the final raspberries on top with some edible gold glitter and your ready to serve!

Bon appetite :) 


Wednesday, 21 August 2013

Raw Blueberry Cheesecake

This is the perfect summer dessert... it is gluten free, dairy free and vegan.. its absolutely heavenly


Serves 10


Ingredients

For the base:

1 and a 1/2 cups of almonds
2 and a 1/2 cups of dates

For the middle:

2 cups of soaked cashews nuts ( soak them for 4 hours before to start )
2 frozen over ripe banana's ( Freeze for 3 hours before to start )
1/2 cup of maple syrup
1/3 cup of apple juice
1 tsp cinnamon 

For the top:

1 cup of freshly frozen blueberries ( Freeze for 3 hours before to start )
1 cup of strawberries
1 frozen banana
4 dates
1 tbsp maple syrup
1 tsp cinnamon 

Once you have frozen the fruit and soaked the nuts for the right amount of time then you can start...


Recipe

The base: 

1. Put the almonds into a food processor and blend for a minute or so until the nuts are nicely crushed. Once this has happened add the pitted dates and blend again until a sticky mix forms. 

2. Press this into the bake of the cake tin ( with a removable side) and place in the freezer. 

Middle layer:

1. Put 2 cups of soaked cashews nuts (soaked), 2 frozen over ripe banana's ( Frozen ), 1/2 cup of maple syrup, 1/3 cup of apple juice, 1 tsp cinnamon into a food processor and blend until smooth and creamy. 

2. Take the base layer out of the freezer and pour three quarters of the mix over it before putting the cake back into the freezer - keep the final quarter of the mix in the processor as it is needed for the top layer.

3. Wait 20 minutes until the middle layer has set in the freezer.

Top layer:

1. Add the 1 cup of freshly frozen blueberries, 1 cup of strawberries, 1 frozen banana, 4 dates, 1 tbsp maple syrup, 1 tsp cinnamon to the blender combined with the mix from the middle, blend until smooth and then pour over the middle layer. 

2. Place the cake back into the freezer to set for two hours before serving. 

You will need to remove the cake from the freezer and allow it to warm up for a 10 minutes before you serve it. 

Then ENJOY!! 


Wednesday, 14 August 2013

Vanilla Cake with Chocolate Mouse

Ever tried chocolate mousse as a cake filling? It tastes amazing and looks incredible. This is an easy cake to make for your loved ones any day of the week. With a topping of fresh mint and fresh fruit it is transformed into a show stopper! This cake will not disappoint.. give it a go.. I promise you it will worth it!!


Ingredients

Vanilla Sponge Cake

8 oz Self Raising Flour
8 oz Butter
8 oz Sugar
4 Eggs
2 tsp Vanilla Extract
1 tsp Almond Extract

Chocolate Mousse 

170g Dark Chocolate (70%)
7 egg whites
Squeeze of lemon juice
40g Caster Sugar

Recipe

First prepare the chocolate mousse, here is how it is done:

1. Melt the chocolate in a heatproof bowl set over a pan of simmering water (do not allow the base of the bowl to touch the water).

2. Whisk the egg whites and lemon juice in a large, clean bowl until they form soft peaks. The lemon juice will stabilise the egg whites, make them easier to work with and help to prevent over-whisking.

3. Add the sugar and continue to whisk until firm peaks form when the whisk is removed. Do not whisk beyond this stage - the egg whites will start to collapse and separate into dry froth and runny liquid, and you'll lose all the air that you've whisked in.

4. When the chocolate has melted, remove the bowl from the heat. Whisk one-third of the egg whites into the hot chocolate quickly and vigorously, until thick and well combined - if you add the egg whites in too slowly, their cold temperature can make the hot chocolate seize, solidify and result in a lumpy mousse.

5. Fold the remaining egg whites into the chocolate mixture, using a spatula, until all of the egg white has been completely incorporated into the chocolate. Don't over mix at this stage as you'll knock out the air bubbles and the mousse will be dense.

6. Place into a large bowl and allow to chill in the fridge whilst you prepare the vanilla sponge.


Vanilla Sponge Recipe

1. Preheat the oven to 180C.

2. Melt the butter in the microwave. Combine with the sugar in a large mixing bowl. 

3. Add the eggs one at a time and mixing until each one is combined before adding another. 

4. Once all the eggs are incorporated add the vanilla and almond extract.

5. Then sift in the flour and fold until just combined to a smooth mixture. 

6. Divide between two circle baking tins lined with baking parchment. 

7. Bake for 40-45 minutes or until a knife is inserted in the middle and removed clean. 

8. Once cooked allow to cool completely before to decorate.


Decoration 

1. Place one cake onto the serving dish and spread the chocolate mousse on the top.

2. Add the second layer and spread a thick layer of chocolate mousse on the top.

3. Decorate with raspberries, strawberries and fresh mint. 

4. Now take a big slice for yourself and enjoy the masterpiece you have created :)


Bon Appétit 


Wednesday, 17 July 2013

Chocolate Fondant with Salted Caramel and Pistachio Ice Cream

One word.. Heaven!!

This may take a little longer than the ordinary desserts.. but let me tell you it is every second worth it!

Here's how it is done...


Ingredients


For the Salted Caramel

15g dark muscovado sugar
200ml double cream
60g caster sugar
Lemon juice, to taste
Pinch of salt
Pinch of black pepper


For the Chocolate Fondant

15g cocoa Powder
15g caster sugar
80g dark chocolate 70%
80g Butter, plus extra for greasing
2 free-range eggs
1 free-range egg yolk
45g icing sugar

& Pistachio Ice Cream


Recipe
  • For the salted caramel

    1. Place the dark muscovado sugar and cream in a saucepan.

    2. Meanwhile, heat the caster sugar in another pan over a low heat, stirring continuously until golden-brown and caramelised. Remove from the heat instantly.

    3. Carefully, pour the hot cream over the caramelised sugar (the mixture may splutter) and return the mixture to a simmer. Continue to simmer until the caramel mixture has thickened and darkened.

    4. Remove the pan from the heat and carefully stir in the lemon juice and salt. Season with freshly ground black pepper and stir gently once more. Set aside to cool slightly.

    5. Pour the caramel into small silicone moulds or ice cube trays. When the caramel has completely cooled, freeze it for at least 2 hours, or until set. (NB: You will not need all of the caramel for this recipe. The remaining caramel can be stored in the freezer for up to 3 months.)


    For the chocolate Fondant

    1. For the chocolate fondant, grease the insides of 4 ring moulds, 5cm/2in diameter and 6cm/2½in deep, with softened butter.

    2. In a bowl, mix together the cocoa powder and caster sugar until well combined. Dust the inside of the ring moulds with the mixture, shaking off any excess. Place the prepared ring moulds onto a baking tray lined with greaseproof paper. ( NB: If you do not have ring mould then use any shape of ramakin and follow the same method)

    3. Melt the chocolate and butter in a heatproof bowl set over a pan of simmering water (do not allow the base of the bowl to touch the water).

    4. Meanwhile, place the eggs and egg yolk into a bowl and whisk together until pale and fluffy.

    5. Sift the icing sugar into the whisked eggs, whisking until well combined. Whisk until the mixture is pale, thick, has doubled in volume and the beaters leave a trail on the surface of the mixture when lifted. (NB: This is called the ribbon stage.)

    6. Whisk the melted chocolate mixture into the egg mixture until well combined.

    7. Using a ladle, fill each of the prepared ring moulds with the chocolate fondant mixture until they are three-quarters full.

    8. Add one piece of frozen caramel to the centre of each ring mould and press down so that it is nestled halfway down the mould. Gently push the chocolate fondant mixture over the caramel to cover it completely. Chill the chocolate fondants in the fridge for at least 30 minutes or up to 24 hours.

    9. When the chocolate fondants have chilled, preheat the oven to 200C/390F/Gas 6.

    10. Transfer the chilled chocolate fondants to the oven and bake for 5 minutes, or until the tops have just formed a crust. Remove the fondants from the oven and allow to cool.

    11. When the fondants have cooled, run a butter knife around the insides of each mould to loosen the fondants. Carefully remove the moulds. Chill the fondants in the fridge for at least 30 minutes.

    12. When ready to serve, preheat the oven to 180C/355F/Gas 4.

    13. Bake the fondants for 8 minutes, or until the cakes have risen.

    14. To serve place the chocolate fondant onto a plate and dust with icing sugar. Scoop up a spoon of pistachio ice cream which will provide the perfect partner. 

    (NB: I cooked my fondants longer as I personally prefer a cake texture rather than a runny texture)


    Enjoy! 


Its time for tea and cakes...

Tea time treats are a necessity worldwide.. Here you can find two recipes for a Tarte au citron which is a classic french patisserie and a almond cake with raspberries. These both go perfect with a nice pot of tea and a relax on the sofa... Perfect for guests.. Friends and family..


Classic, Rustic and utterly Delicious...


Tarte au Citron

Ingredients


500g Pastry
5 Free-range eggs
125ml Double cream
225g Caster sugar
4 Lemons, juice and zest
Icing sugar, for dusting

Recipe

1. Roll out the Pastry so it is just a little bigger than the tart tin. Press the pastry into the flutes of the tin then lightly prick the base with a fork, but not quite all the way through. Place the pastry-lined tin on a baking tray, cover loosely with cling film and chill in the fridge for 30 minutes.

 2. Preheat the oven to 200C/400F/Gas 6.

3. Remove the cling film from the pastry case and line with foil so it supports the sides, then fill with baking beans. Bake blind for 12-15 minutes, until the pastry is set, then lift out the foil and beans. 

4. Carefully trim the excess pastry from the sides using a sharp knife, holding the knife at a sharp angle and slicing away from you. Remove the trimmings from the sheet. 

5. Return the empty pastry case to the oven for another 10-12 minutes or until it is pale golden and completely dry. Set aside to cool while you make the filling. 

6. Reduce the oven temperature to 170C/325F/Gas 3.

7. For the filling, break the eggs into a large bowl and whisk together with a wire whisk. Add the rest of the filling ingredients and whisk again until they are all well combined. Pour the filling mixture into a jug, then into the cooled baked pastry case. 

8. To prevent it spilling as it goes in the oven, pour in most of the filling so it almost fills the tart, carefully sit the baking sheet and tart on the oven shelf, then top up with the rest of the filling to completely fill it.

9.  Bake for about 30-35 minutes or until just set but with a slight wobble in the centre.

10. Leave to cool slightly then, when the pastry seems firm enough, remove the tart from the tin. 

11. Transfer the tart to a serving plate and serve warm or cold, dusted with sifted icing sugar.


Almond cake with Raspberries


Ingredients

3 Eggs
150g Caster Sugar
230g Self Raising Flour
150g Soft Butter
80g Ground Almonds
1 tbsp Vanilla Extract
1tsp Baking Powder
8 Dessert Spoons of Milk
1 Box of Raspberries


Recipe

1. Preheat the oven to 180C/ 160 Fan

2. In a bowl, beat the eggs with the sugar. 

3. Incorporate the flour, baking powder, ground almonds, vanilla extract, the milk then the melted butter. Mix to a smooth paste.

4. Pour half of the mixture into the baking tin greased and lined with baking parchment.

5. Add the raspberries, then pour in the rest of the mixture. 

6. Add more raspberries from the top, push down until just covered. 

7. Bake for 50 minutes, test with a knife in the centre to check to see if it is cooked. If the knife comes out clean then it is done. If the knife comes out with mixture on then put the cake back in with foil over the top for another 10 minutes. 


Serve both cakes with a nice pot of tea and gather round a coffee table for a natter! 

Enjoy :)


Pear and Almond Tart

This tart is moist from the almond filling, crispy round the edges from the pastry and succulent in the centre with the pears. With my very simple recipe you could have this knocked up within an hour... Give it a go... It's definitely worth it!


Ingredients

500g of Shortcrust pastry
100g Soft butter
100g Caster sugar
100g Ground almonds
3 tbsp Plain flour
1 egg
1 Tin of pears
1 tsp Icing sugar


Recipe


1. Preheat the oven to 180°C /  Fan 160C.

2. Unravel the ready-rolled pastry and use it to line a flan tin. Roll it out a touch more, if necessary, to fit in perfectly. 

3. Try and get the pastry right into the fluted edges of the tin. You can use a wooden spoon handle dipped in some flour to ease the pastry into the ‘flutes’. Cut off the excess pastry with a sharp knife and then sit the tin on a baking sheet and pop in the fridge to harden up a bit while you prepare the filling.

4. Mix the butter and sugar together in a medium bowl either by hand or using a hand-held electric whisk (or in a freestanding electric mixer) until it is really soft and well combined. Then beat in the ground almonds and plain flour.

5. Crack the egg in and then beat it hard so everything is combined. Remove the lined tin from the fridge and add the almond filling, spreading it out evenly so it is nice and smooth on top.

6. Drain the tinned pears well in a colander and then on kitchen paper. Score them horizontally as the picture shows.

7. Arrange the pear halves, cut side down, in the almond filling.

8. Bake in the oven for 35-45 minutes or until the filling is nicely puffed up and golden.

9. Decorate with icing sugar and then ... dig in!!!! 


Thursday, 20 June 2013

Classic Chocolate Cake with a Twist

Fancy a delicious chocolate cake this weekend to wow your guests?

This cake is decorated with chocolate buttercream. The central layer is an eggless chocolate cake filling which is seductively smooth and moist, sandwich between two vanilla layers. 

Follow my recipe for an heavenly treat....


Ingredients 

Vanilla Sponge

225g Caster Sugar
225g Soften Butter
225g Self Raising Flour
1 tbsp Vanilla Extract
4 Eggs
3 tbsp Milk

Eggless Chocolate Cake Filling

85g Butter
2 tbsp Golden Syrup
1 tbsp Vanilla Extract
300g Self Raising Flour
100g Caster Sugar
25g Cocoa Powder
1tsp Bicarbonate of Soda

Chocolate Buttercream Icing

110g Butter, Softened 
170g Icing Sugar
55g Cocoa Powder
1-2 tbsp Milk


Recipe

Lets start with the Eggless Chocolate Filling Recipe:

1. Heat the Oven to 160/C Fan and Grease your cake tin.
2. Tip the butter, Syrup and vanilla into a heatproof jug, add 300ml boiling water and briefly whisk with a fork to combine. 
3. Sift the flour, sugar, cocoa and bicarbonate of soda into a large bowl, then tip in the butter mixture. Stir until you have a smooth batter, then scrape into a prepared tin. 
Bake for 50 minutes. 
4. Cool in the tin for around 5 minutes before turning out and crumbling it up into another bowl.

Now lets make the Vanilla Sponge Recipe:

1. Preheat the oven to 180/C. 
2. Cream the butter and sugar together using a handheld whisk until pale, light and fluffy (around 2-3 minutes)
3. Gradually add the eggs, mixing well between each addition and occasionally scraping down the bowl with a spatula. 
4. Stir in the vanilla extract. Sift together the flour and baking powder and add to the cake mixture in two batches, mixing until smooth. 
5. Add the milk and mix until smooth. 
6. Pour into two greased and lined equally sized cake tins and bake for around 22 minutes until a skewer comes out clean from the middle. 
7. Once baked, allow to cool before assembling. 


Whilst the cakes are cooling you can prepare your buttercream icing with this recipe:

1. Beat the butter in a large bowl until soft. 
2. Add half of the icing sugar and beat until smooth.
3. Add the remaining of the icing sugar, cocoa powder and one tablespoon of the milk until creamy. 


Assembling the cakes


1. Lay one of the vanilla sponge on your serving dish top side facing downwards. 
2. Push together the eggless cake to make a layer of chocolate cake filling. 
3. Add the other vanilla cake on the top, this time top side facing upwards, and squish down so everything is compact. 


Decoration


1. Place the chocolate buttercream into a piping bag and start on the top centre of the cake. Start making a circle then follow it around the outside until you fill the entire top cake.
2. Using a palette knife cover the sides of the cake with the chocolate buttercream and then scrape round with a edged decorating tool, you can buy one of these on amazon. 
3. Decorate with edible white snowflakes and fresh strawberries. 


This is a stunning cake that will be appreciated and demolished! 


xxx


Friday, 14 June 2013

Vanilla and Chocolate Cake

This cake is sooo tasty you have to try it, I promise you will not be disappointed. 


Ingredients

Vanilla Sponge (bottom layer) ( inch cake tin)

<Bake this cake first as it take longer to cook>

450g Soft butter
450g Caster sugar
450g Self-raising flour
8 Eggs
6 tbsp Milk
2 tsp Vanilla Extract


Chocolate sponge (top layer) ( inch cake tin)

225g Soft butter
225g Caster sugar
450g Self-raising flour
4 Eggs
3 tbsp Milk
1 tsp Vanilla Extract
3 Tbsp Cocoa Powder

Vanilla Buttercream Icing

600ml Double Cream
300g Icing Sugar
3 tsp Vanilla Extract


Recipe


1. Heat oven to 180C/fan assisted oven160C.  

2. Grease the cake tins and line the bottom with a circle of greaseproof paper. If you want to make life easy, simply put all the ingredients into a food processor and whizz for 1-2 mins until smooth. 

3. If you prefer to mix by hand, beat the butter and sugar together, then add the eggs, one at a time, mixing well after each addition. Fold through the flour, milk and vanilla extract until the mixture is smooth. Add Cocoa Powder at the end for the chocolate sponge.

4. Tap the bottom on your work surface to ensure that there aren't any air bubbles.

5. Bake the Vanilla cake for 60 minutes, reduce heat after 25 minutes to 130C

6. Bake the Chocolate cake for 30 minutes at 160C.

7. Once ready, allow to cool before assembling. 


Icing

1. Pour the double cream into a bowl and whisk with an electric whisk until thick.
2. Whisk in the icing sugar until the mixture is stiff.
3. Stir in the vanilla extract


Assembling cakes & Decoration

1. Place the Vanilla cake onto a serving plate and cut of the top of the cake so it is flat. ( I eat this part whilst decorating the cake, simply irresistible ;) )

2. Get your icing and place it into a piping bag and pipe on around the top of the vanilla cake then fill the centre. 

3. Place the Chocolate cake on top. 

4. Pipe swirls and roses or any design onto the rest of the cake and decorate with macarons and fresh fruit. 

A cake to make an impression... DONE!

xx